
A CCIE Lab remote PDU for less than 100$
Since I made my own CCIE Lab rack at home, I’m constrained to ask my girlfriend to power it on every time I need to lab something at work. She’s really nice, and beautiful as a power management device, but it’s not handy and she is not every time at home, so I searched for a low price PDU, not an APC at more than 1000$.
Here is an article about how to create a Wireless remote PDU for your CCIE Lab. Here is how to do it for less than 100$ with a Raspberry PI and a 433Mhz module.
Here are some screenshots of the WEB application I made with the great blog of Mr. idleman (blog.idleman.fr).
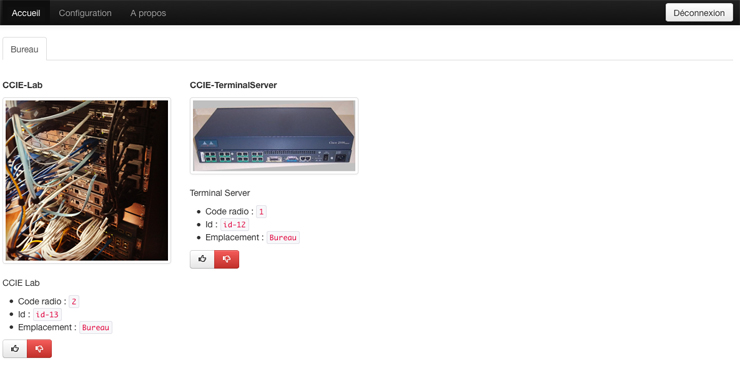
The home page with the devices remote management:
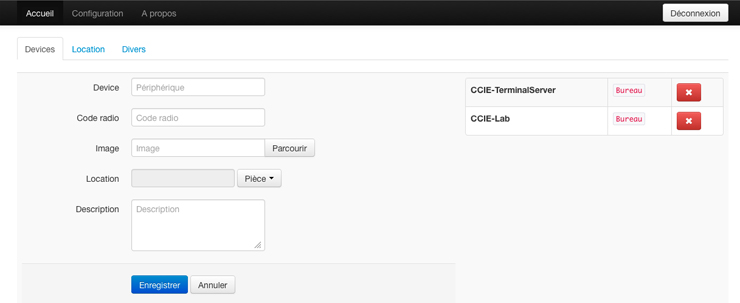
The configuration, without using a database:
Required Hardware:
- A Raspberry PI model A or B ~50$ with the flash, connectors… etc
- A set of 3 power plug “chacon” + remote commande.
- RF 433Mhz transmitter.
Here is how to connect it:

Regarding the antenna, it didn’t worked for me without it, so I took an old RJ45 and stripped the copper wire. Then I surrounded the copper wire at the antenna part of the little 433Mhz Emettor.
The code of the web interface and the C program who emit the signal is downloadable here: http://projet.idleman.fr/domopi/data/hcc/hcc.zip.
- Unzip the code in a folder var/www/hcc
- Do a chmod 777 -R sur tous le dossier hcc (important sinon rien ne fonctionnera)
- Do a chmod 7777 on the executable file “radioEmission”
- That’s it. (you may have some rights issues, in this case, check the /var/log/apache2/errors.log, it can help to troubleshoot,)
how it works?
You can send a signal by two ways :
- With a linux command line:
./var/www/hcc/radioEmission 0 12325261 1 on
0 = The number WiringPi of the Raspberry PI’s PIN linked to the card 433mhz
(Here O, matching the physical PIN 11 of the Raspberry PI).
12325261 = A random code for the remote command.
1 = Receptor code (Randomly choosen, the power plug will know if the message is for him or another one).
on = state of the power plug [ON / OFF]
nb : The ./ is mandatory.
- From the web interface :
Who in fact execute the previous command when we click on an item.
In order to connect, the default password and login are the following:
login: admin
mdp: admin
You can change them from the file constant.php located in the folder HCC.
Note you cant control anything before the power plugs learn the signal you send. More explanations below.
The link transmitter/receiver
The Chacon power plugs have a learning module integrated signals, which mean that when you plug in, they “listen” for 5 seconds the signals and recognize these signals after.
So you need to take each power plugs, connect it and then transmit the signal with the Raspberry PI (from the WEB interface http://your.raspberry.pi/hcc or command line) before 5 seconds it is subsequently connected to the signal.
You’ll recognize successive “click clack” alert that the remote has received your signal and memorized it.
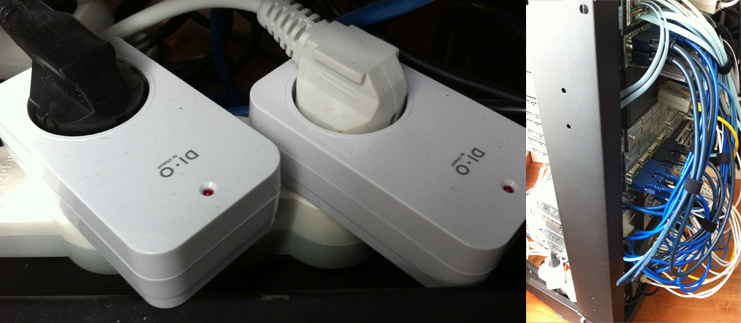
Here is how the Chacon power plugs look like, on the left the plugs, and on the right, the lab powered by the two wireless power plus at the bottom left:
If you have any problems brought, large parasites, or poor communication, think about doing these two things:
- Connect an external power supply to the radio cards and power them to the maximum of what they are capable of doing (between 5 and 12V)
- Welding a conductor wire of 17.3 cm to the transmitter and receiver antennas to be used.
With these two points, you can spend a few centimeters to several hundred meters range, the difference is really obvious.
Source : blog.idleman.fr/?p=1970
Benoit
Network engineer at CNS Communications. CCIE #47705, focused on R&S, Data Center, SD-WAN & Automation.
Follow Me:

Comments are Disabled